|
|
Disc Two
|
Disc Three
|
Optional Bosses
|
The numerous Bosses in FFVII can be pretty tricky to defeat,
so here's a guide to all of them, starting with Disc One. For Disc
Two and Three, and Optional Bosses click on one of the links above.
Select a Boss to take you to it's details, statistics and strategy.
Guard Scorpion
Air Buster
APS
Reno
Sample: H0512
 Sample: H0512-OPT
Hundred Gunner
Heli Gunner
Rufus
Dark Nation
Motor Ball
Bottomswell
JENOVA BIRTH
Dyne
Reno
Rude
Gi Nattak
Soul Fire
Materia Keeper
Palmer
Red Dragon
Demon Gate
JENOVA LIFE
Guard Scorpion
Sample: H0512-OPT
Hundred Gunner
Heli Gunner
Rufus
Dark Nation
Motor Ball
Bottomswell
JENOVA BIRTH
Dyne
Reno
Rude
Gi Nattak
Soul Fire
Materia Keeper
Palmer
Red Dragon
Demon Gate
JENOVA LIFE
Guard Scorpion
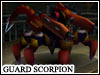 Difficulty
 - Easy
Recommended Level - 3+
| Name |
Level |
HP |
MP |
EXP |
AP |
GIL |
| Guard
Scorpion |
12 |
800 |
0 |
100 |
10 |
100 |
| Location |
Attacks |
| Midgar,
Reactor #1. |
Search
Scope - Scorpion Tail - Rifle Tail |
| Immune |
Weakness |
| Bad
Breath - Sleep - Confusion - Silence - Darkness - Transform
- Berserk - Poison - Paralyze - Petrify - Manipulate - Mystify
- Gravity - Death |
Lightning |
| Steal |
Morph |
Win |
Enemy
Skill |
| None |
None |
Assault
Gun (A Weapon for Barret) |
None |
| Strategy |
The
first Boss of the game is a real pushover, to start off have
Barret attack and Cloud use Bolt, (it's Guard Scorpion's weakness)
and use any Limit Breaks if you have them.
GS will use Search Scope on the character that it will attack
on it's next turn, so use a Potion if that character's HP
is low.
About halfway through the battle, GS's tail will rise, meaning
that it will counter-attack anything you do to it with a very
damaging blow to all Party Members (Scorpion Tail).
To avoid it, just wait until the tail is lowered again and
blast it with all you have left.
GS's tail may rise again if you don't kill it quickly enough,
if it does just wait until it goes back down and attack until
it's KO'd.
When the battle is over you'll receive Barret's weapon 'Assault
Gun', equip it as quickly as you can as there is a ten minute
countdown for the next section... |
Air Buster
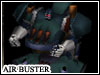 Difficulty
 - Easy
Recommended Level - 5+
| Name |
Level |
HP |
MP |
EXP |
AP |
GIL |
| Air
Buster |
15 |
1200 |
0 |
100 |
10 |
100 |
| Location |
Attacks |
| Midgar,
Reactor #5. |
Counter
Attack - Big Bomber- Rear Gun |
| Immune |
Weakness |
| Earth
- Gravity - Bad Breath - Sleep - Confusion - Silence - Darkness
- Transform - Berserk - Poison - Paralyze - Petrify - Manipulate
- Mystify - Death |
Lightning |
| Steal |
Morph |
Win |
Enemy
Skill |
| None |
None |
Titan
Bangle (Armor) |
None |
| Strategy |
|
This Boss is a lot trickier than Guard Scorpion,
as every attack causes a fair amount of damage and AB counter-attacks
your party when they attack!
An easy way to beat him is to get each character's Limit
Bar full and unleash the attack when AB's back is turned
towards that character. As the party has to split up for
this battle, (Cloud on the right,
Barret and Tifa on the left) use Cloud's Limit when AB is
facing Barret and Tifa and Barret and/or Tifa's Limit when
AB is facing Cloud.
Doing this on my game I beat AB with only two Limit Breaks!
Sadly it might not work if your Limits are not strong enough
and/or you strike when AB is facing the attackihg character,
causing less damage.
So try attacking when AB is facing the other way and as
a precaution you can have Tifa on standby to cure, (either
Potions or Cure + All works fine) when your party is injured.
AB's Big Bomber attack can be pretty deadly, so keep an
eye on HP levels. As this Boss is a machine, Cloud's 'Bolt'
Materia works very well.
After the battle you'll be rewarded with a Titan Bangle,
congratulations!
|
APS
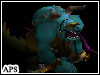 Difficulty
 - Easy
Recommended Level - 7+
| Name |
Level |
HP |
MP |
EXP |
AP |
GIL |
| APS |
18 |
1800 |
0 |
240 |
22 |
0 |
| Location |
Attacks |
| Midgar,
Sewers under Don Corneo's Mansion. |
Tail
- Sewer Tsunami |
| Immune |
Weakness |
| Gravity
- Bad Breath - Sleep - Confusion - Silence - Darkness - Transform
- Berserk - Poison - Paralyze - Petrify - Manipulate - Mystify
- Stop - Death |
Fire |
| Steal |
Morph |
Win |
Enemy
Skill |
| None |
None |
Phoenix
Down (Healing Item) |
None |
| Strategy |
|
APS is a fairly easy Boss, he'll use a Tsunami
attack which causes the Sewage water to wash over you, (yuck!)
it deals a lot of damage but fortunately harms himself as
well!
On my game, he used the attack and killed himself, the irony!
^_^
Anyway, use the 'Fire' and 'Lightning' Materia on him to
cause some damage. As soon as anyone has a Limit, use it!
Aeris' 'Healing Wind' should also come in useful as you'll
need to heal often.
If Aeris and Tifa have low Maximum HP, then you can equip
Cloud with 'Cover' Materia to take most of the damage, which
also increases his Limit so you can use it more frequently.
After the battle you'll get a Phoenix Down, not a fantastic
prize, but useful nonetheless.
|
Reno
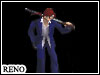 Difficulty
 - Easy
Recommended Level - 9+
| Name |
Level |
HP |
MP |
EXP |
AP |
GIL |
| Reno |
17 |
1000 |
0 |
290 |
22 |
500 |
| Location |
Attacks |
| Midgar,
Sector 7 Pillar. |
Electro-Mag
Rod - Pyramid |
| Immune |
Weakness |
| Gravity
- Bad Breath - Sleep - Confusion - Silence - Darkness - Transform
- Berserk - Poison - Paralyze - Petrify - Manipulate - Mystify
- Stop - Death |
None |
| Steal |
Morph |
Win |
Enemy
Skill |
| None |
None |
Ether
(Healing Item) |
None |
| Strategy |
|
Reno is pretty nasty, he uses an electric
rod attack that deals a fair amount of damage, he also uses
'Pyramid' which traps a party member so that he/she can't
attack!
The only cure is to attack that party member directly to
free him/her, this, strangely enough, doesn't cause any
damage.
Use 'Fire' and 'Ice' Materia against him, but do not use
'Lighting' - it doesn't do much damage as it is Reno's strength!
Unleash as many Limits as you can on him, curing/freeing
party members occasionally and the battle will soon be over.
You'll win an Ether when you've defeated him, which will
be useful for your next mission...
|
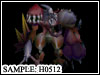
Sample: H0512
 Difficulty
 - Easy
Recommended Level - 12+
| Name |
Level |
HP |
MP |
EXP |
AP |
GIL |
| Sample:
H0512 |
19 |
1000 |
120 |
300 |
30 |
250 |
| Location |
Attacks |
| Shinra
HQ Floor 67. |
Claw
- Shady Breath |
| Immune |
Weakness |
| Ice
- Gravity - Bad Breath - Sleep - Confusion - Silence - Darkness
- Transform - Berserk - Poison - Paralyze - Petrify - Manipulate
- Mystify - Stop - Death |
None |
| Steal |
Morph |
Win |
Enemy
Skill |
| None |
None |
Talisman
(Accessory) |
None |
| Strategy |
|
H0512 uses Poison based attacks, so if you
have an 'Elemental' Materia, you can link it to that 'Poison'
Materia, (found in a chest next to the last Save Point)
onto
someone's Armor to protect from Poison, you should also
have at least one Star Pendant Accessory by now to protect
another character. Apart from that, there's nothing
you can do about the Poison, so I hope you have some Antidotes
or Remedies!
H0512 is joined by three wimpy Sample: H0512-OPT, (see
below) which attack your party. They don't cause much
damage, so just leave them alone and concentrate on
attacking H0512 head on. (H0512-OPT regenerate so there's
no point anyway).
As for H0512, use Limit Breaks, physical attacks, 'Fire'
and 'Lightning' Magic, but don't use 'Ice'! You'll also
be fighting with a new party member; Red XIII, who has 'Fire'
+ 'All' and 'Sense'
Materia equipped which comes in useful.
Remember to 'Cure' often and that 'Poison' causes continuous
damage, so you'll want to cure it as soon as possible!
For all your hard work you'll get a Talisman Accessory,
well done... But it's not over yet!
|
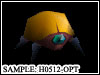
Sample: H0512-OPT
 Difficulty
 - Easy
Recommended Level - 12+
| Name |
Level |
HP |
MP |
EXP |
AP |
GIL |
| Sample:
H0512-OPT |
7 |
300 |
48 |
20 |
2 |
0 |
| Location |
Attacks |
| Shinra
HQ Floor 67. |
Rolling
Attack |
| Immune |
Weakness |
| Bad
Breath - Sleep - Confusion - Silence - Darkness - Berserk
- Poison - Petrify - Manipulate - Mystify - Death |
None |
| Steal |
Morph |
Win |
Enemy
Skill |
| None |
None |
Grenade
(Battle Item) |
None |
| Strategy |
|
Just leave these H0512-OPT alone and focus
on H0512, their attacks are wimpy and they regenerate when
you kill them anyway.
|
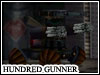
Hundred Gunner
 Difficulty
 - Not quite so Easy
Recommended Level - 14+
| Name |
Level |
HP |
MP |
EXP |
AP |
GIL |
| Hundred
Gunner |
18 |
1600 |
0 |
330 |
35 |
300 |
| Location |
Attacks |
| Shinra
HQ Floor 69 Lift. |
Aux
Artillery - Hidden Artillery - Main Artillery - Wave Artillery |
| Immune |
Weakness |
| Leviathan
- Gravity - Bad Breath - Sleep - Confusion - Silence - Darkness
- Berserk - Poison - Petrify - Manipulate - Mystify - Transform
- Paralyze - Stop - Death |
Lightning |
| Steal |
Morph |
Win |
Enemy
Skill |
| None |
None |
None |
None |
| Strategy |
|
They just keep getting harder don't they?
Hundred Gunner is a tough one, it attacks you just as you're
going down in the lift, however with it being in the lift
opposite you, you can't use physical attacks.
Use Barret as your attacker, (he has a Long Range weapon)
and equip Red and Aeris with 'Lightning' Materia, you should
have two if you bought another from a Materia Shop.
Then give a party member a Restore + All linked together
as your healer, it would be best to give Barret, (or a party
member without a 'Lightning' Materia equipped) the healing
job.
Hundred Gunner will be using some nasty attacks, but definitely
watch out for it's 'Wave Artillery' as it causes damage
to all party members!
Whenever one of your party members has a Limit, use it quickly.
Red and Barret have good attacking Limits that deal a fair
amount of damage. Aeris' Limit is the most valuable for
this Boss though, as it heals all your party members for
a generous amount.
So, attack with Barret, use 'Bolt' as much as possible,
heal frequently with a 'Restore' + 'All' or Aeris' Limit,
and whenever Barret or Red have Limits, use them!
Oh and BTW, it's not over yet...
|
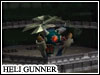
Heli Gunner
 Difficulty
 - Not quite so Easy
Recommended Level - 14+
| Name |
Level |
HP |
MP |
EXP |
AP |
GIL |
| Heli
Gunner |
19 |
1000 |
0 |
250 |
25 |
200 |
| Location |
Attacks |
| Shinra
HQ Floor 69 Lift. |
AB
Cannon - C Cannon - Spinning Bodyblow - Firing Line - Flying
Drill |
| Immune |
Weakness |
| Earth
- Gravity - Bad Breath - Sleep - Confusion - Silence - Darkness
- Berserk - Poison - Petrify - Manipulate - Mystify - Transform
- Paralyze - Stop - Death |
Lightning -
Wind |
| Steal |
Morph |
Win |
Enemy
Skill |
| None |
None |
Mythril
Armlet (Armor) |
None |
| Strategy |
|
What?! Where'd this thing come from?!
Yep, straight after Hundred Gunner you have to fight a,
(fortunately not quite as tough) Heli Gunner... Great.
Anyway pretty much the same tactics here as Hundred Gunner,
attack with Barret, use 'Bolt' as much as possible, heal
frequently with a 'Restore' + 'All' or Aeris' Limit, and
whenever Barret or Red have Limits, use them!
Heli will have some different attacks, and will fly, but
it's nothing to worry about. If you missed the strategy
for the last Boss, look below for more tips...
Use Barret as your attacker, (he has a Long Range weapon)
and equip Red and Aeris with 'Lightning' Materia, you should
have two if you bought another from a Materia Shop.
Then give a party member a Restore + All linked together
as your healer, it would be best to give Barret, (or a party
member without a 'Lightning' Materia equipped) the healing
job.
Heli will be using some nasty attacks, but definitely watch
out for it's Cannon attacks as it causes a good bit of damage!
Whenever one of your party members has a Limit, use it quickly.
Red and Barret have good attacking Limits that deal a fair
amount of damage. Aeris' Limit is the most valuable for
this Boss though, as it heals all your party members for
a generous amount.
So, attack with Barret, use 'Bolt' as much as possible,
heal frequently with a 'Restore' + 'All' or Aeris' Limit,
and whenever Barret or Red have Limits, use them!
Oh and BTW, it's still not over yet...
|
Rufus
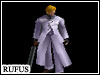 Difficulty
 - Not quite so Easy
Recommended Level - 14+
| Name |
Level |
HP |
MP |
EXP |
AP |
GIL |
| Rufus |
21 |
500 |
0 |
240 |
35 |
400 |
| Location |
Attacks |
| Top
of Shinra HQ. |
Shotgun |
| Immune |
Weakness |
| Gravity
- Bad Breath - Sleep - Confusion - Silence - Darkness - Berserk
- Poison - Petrify - Manipulate - Mystify - Transform - Stop
- Death |
None |
| Steal |
Morph |
Win |
Enemy
Skill |
| None |
None |
Protect
Vest (Accessory) |
None |
| Strategy |
|
Ok, now to get battling Rufus, and BTW Cloud
is gonna be on his own this time, but you get to sort out
your Materia before the battle, fortunately.
Equip Cloud with a 'Restore', (on it's own, no All's needed
this time) and a 'Lightning', (with an 'All' this time)
along with any other useful Materia you might have.
Rufus will be using a Shotgun attack which only does about
50 damage, but he'll be joined by a 'Dark Nation' which
not only attacks you, but casts Barrier and MBarrier on
itself and Rufus!
So first eliminate the Dark Nation using 'Lightning' Materia,
(if you linked it to an 'All' it will also damage Rufus)
attack, and Limit Breaks. Keep in mind you won't be doing
as much damage due to the Barriers.
When the Dark Nation is down, focus on Rufus, his Barriers
will soon wear off, allowing you to attack full power. Limits
work brilliantly, so unless your HP is low, use them straight
away!
You may have to 'Cure' every other turn though; Rufus will
be attacking very frequently so watch your HP!
For all your hard work, you'll get a Protect Vest Accessory!
|
Dark Nation
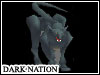 Difficulty
 - Easy
Recommended Level - 14+
| Name |
Level |
HP |
MP |
EXP |
AP |
GIL |
| Dark
Nation |
18 |
140 |
80 |
150 |
15 |
100 |
| Location |
Attacks |
| Top
of Shinra HQ, with Rufus. |
Bite
- Barrier - MBarrier - Bolt |
| Immune |
Weakness |
| Gravity
- Petrify - Manipulate - Mystify - Transform - Death |
Lightning |
| Steal |
Morph |
Win |
Enemy
Skill |
| None |
None |
Guard
Source (Item) |
None |
| Strategy |
|
Rufus will be joined by a 'Dark Nation' which
not only attacks you, but casts Barrier and MBarrier on
itself and Rufus!
So first eliminate the Dark Nation using 'Lightning' Materia,
(if you linked it to an 'All' it will also damage Rufus)
attack, and Limit Breaks. Keep in mind you won't be doing
as much damage due to the Barriers.
For all your hard work, you'll get a Guard Source and extra
EXP!
|
Motor Ball
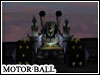 Difficulty
 - Not very Easy
Recommended Level - 16+
| Name |
Level |
HP |
MP |
EXP |
AP |
GIL |
| Motor
Ball |
19 |
2600 |
120 |
440 |
45 |
350 |
| Location |
Attacks |
| End
of Road leading out of Midgar. |
Arm
Attack - Twin Burner - Rolling Fire |
| Immune |
Weakness |
| Fire
- Gravity - Bad Breath - Sleep - Confusion - Silence - Darkness
- Berserk - Poison - Petrify - Manipulate - Mystify - Transform
- Paralyze - Stop - Death |
Lightning |
| Steal |
Morph |
Win |
Enemy
Skill |
| None |
None |
Star
Pendant (Accessory) |
None |
| Strategy |
|
Well, Shinra put up a good fight don't they?
Don't worry this is the last one.
Anyway, Motor Ball will be using Fire based attacks, so
if you have any way of protecting against Fire, equip it!
As Motor Ball is a machine, using Lightning, (yet again)
is a must.
I recommend Cloud, Red and Aeris for this battle, equip
Red and/or Cloud with 'Lightning' Materia, and Aeris with
'Restore' + 'All'. Have Aeris in the back row, healing when
needed, Red and Cloud in the front row, dealing physical
attacks and casting Bolt.
Eventually Motor Ball will use 'Rolling Fire' this is bad
news, it deals around 200 damage to all party members! Take
advantage of this, by using any Limit Breaks that have filled
up by MB and bringing it down! Of course you'll probably
want to heal before this, so have Aeris use that 'Cure'
+ 'All' or her 'Healing Wind' Limit if she has it.
Before you now it, Motor Ball will be long gone and you're
free from Midgar at last! You'll also be rewarded with the
Accessory: Star Pendant. ^_^
|
Bottomswell
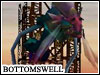 Difficulty
 - Not very Easy
Recommended Level - 18+
| Name |
Level |
HP |
MP |
EXP |
AP |
GIL |
| Bottomswell |
23 |
2500 |
100 |
500 |
52 |
1000 |
| Location |
Attacks |
| Junon
Town beach. |
Tail
Attack - Big Wave - Moonstrike |
| Immune |
Weakness |
| Earth
- Gravity - Bad Breath - Sleep - Confusion - Silence - Darkness
- Berserk - Poison - Petrify - Manipulate - Mystify - Transform
- Paralyze - Stop - Death |
Wind |
| Steal |
Morph |
Win |
Enemy
Skill |
| None |
None |
Power
Wrist (Accessory) |
None |
| Strategy |
|
Yeah, it's really called Bottomswell. ^_^
Anyway, the 'Chocomog' Summon Materia I hope you got from
the Chocobo Farm, works very well against Bottomswell, so
make sure you use it against it.
Bottomswell will use an attack which traps a party member
in a blue bubble, which slowly drains that character's HP!
The only way to free them is to cast magic on the bubble.
Don't worry; it won't damage the imprisoned character!
It'll also use a 'Big Wave' attack, damaging your party
and itself. Which, (like APS) could be it's downfall! ^_^
Also, since Bottomswell is flying, physical attacks won't
work. So use Barret's attacks and/or Yuffie, if you have
her. You could also use that 'Long Range' Materia you should
have from the Mythril Mines.
So, use 'Chocomog' Materia, 'Lightning' Materia (for attacking
Bottomswell and freeing trapped party members), Limits (Aeris'
Limit is useful as always), Curing when you need to and
attacking with Long range characters. And after all that
you'll get the Power Wrist Accessory, phew!
|
JENOVA BIRTH
 Difficulty
 - Not Easy
Recommended Level - 18+
| Name |
Level |
HP |
MP |
EXP |
AP |
GIL |
| JENOVA
BIRTH |
25 |
4000 |
110 |
680 |
64 |
800 |
| Location |
Attacks |
| Junon
Ship, Cargo Hold. |
Tail
Laser - Gas - W-Laser - Stop |
| Immune |
Weakness |
| Earth
- Gravity - Bad Breath - Sleep - Confusion - Silence - Darkness
- Berserk - Poison - Petrify - Manipulate - Mystify - Transform
- Paralyze - Stop - Death |
None |
| Steal |
Morph |
Win |
Enemy
Skill |
| None |
None |
White
Cape (Accessory) |
None |
| Strategy |
|
Ok, this is a mean one. JENOVA will be using
Laser attacks and may even attack twice in a row! The main
thing to worry about though, is her 'Stop' magic. It will
stop a party member's Time Gauge, meaning they won't be
ably to do anything! I think a Remedy would fix the status,
but if it doesn't, it may wear off instead.
Right, equip 'Chocomog' and your new 'Shiva' Summons to
deal some damage, Enemy Skills work well, also having 'Lightning'
is good for a party member with a weak attack.
Have Aeris in your party as your healer, occasionally casting
spells. Cloud and another strong character, (Red or Yuffie
will do) should be attacking full force, using as many Limits
as possible.
Despite the HP, Jenova will soon be defeated and you'll
get a White Cape Accessory!
|
Dyne
 Difficulty
 - Not Easy
Recommended Level - 19+
| Name |
Level |
HP |
MP |
EXP |
AP |
GIL |
| Dyne |
23 |
1200 |
20 |
600 |
55 |
750 |
| Location |
Attacks |
| Gold
Saucer Prison. |
Needle
Gun - S-Mine - Molotov Cocktail |
| Immune |
Weakness |
| Gravity
- Confusion - Silence - Berserk - Petrify - Manipulate - Mystify
- Transform - Death |
None |
| Steal |
Morph |
Win |
Enemy
Skill |
| None |
None |
Silver
Armlet (Armor) |
None |
| Strategy |
|
You'll be fighting Dyne with just Barret,
so you might want to equip him with some good Materia first.
Summons, 'Fire' Magic, 'Restore' (without 'All'), Enemy
Skills and Limits work well.
You may need to cure Barret very frequently as Dyne may
be taking almost half of your HP every turn! The only good
thing about this, is that you can blast him with some Limits!
^_^
Molotov Cocktail is a nasty attack, so heal if your HP is
below half way, before attacking.
For beating Dyne you'll get a Silver Armlet Armor, not bad.
|
Reno
Difficulty - Not quite so Easy
Recommended Level - 20+
| Name |
Level |
HP |
MP |
EXP |
AP |
GIL |
| Reno |
22 |
2000 |
80 |
660 |
60 |
1500 |
| Location |
Attacks |
| Entrance
to Gongaga (with Rude). |
Slap
- Turk Light - Electropod |
| Immune |
Weakness |
| Gravity
- Confusion - Silence - Berserk - Petrify - Manipulate - Mystify
- Transform - Death |
None |
| Steal |
Morph |
Win |
Enemy
Skill |
| None |
None |
Fairy
Tale (A Weapon for Aeris) |
None |
| Strategy |
|
This battle pretty easy, but Summons are definitely
recommended. 'Ramuh', 'Shiva' and 'Ifrit' are a must. Reno's
attacks can be very annoying; doing plenty of damage, so
use 'Restore' + 'All' to heal your party. You could also
use Aeris' 'Healing Wind' Limit as an emergency cure.
After casting your Summons, use strong magic, (preferably
with an 'All') and Limits if you have them.
Soon the battle will be won and the Fairy Tale Weapon for
Aeris will be yours.
|
Rude
 Difficulty
 - Not quite so Easy
Recommended Level - 20+
| Name |
Level |
HP |
MP |
EXP |
AP |
GIL |
| Rude |
23 |
2000 |
135 |
720 |
70 |
2000 |
| Location |
Attacks |
| Entrance
to Gongaga (with Reno). |
Punch
- Fire - Cure |
| Immune |
Weakness |
| Gravity
- Confusion - Silence - Berserk - Petrify - Manipulate - Mystify
- Transform - Death |
None |
| Steal |
Morph |
Win |
Enemy
Skill |
| None |
None |
X-Potion
(Item) |
None |
| Strategy |
|
This battle pretty easy, but Summons are definitely
recommended. 'Ramuh', 'Shiva' and 'Ifrit' are a must. Rude's
attacks can be very annoying; doing plenty of damage, so
use 'Restore' + 'All' to heal your party. You could also
use Aeris' 'Healing Wind' Limit as an emergency cure.
After casting your Summons, use strong magic, (preferably
with an 'All') and Limits if you have them. Make sure to
beat Rude quickly to stop him from curing himself and Reno.
Soon the battle will be won and the X-Potion will be yours.
|
Gi Nattak
 Difficulty
 - Just below Medium
Recommended Level - 22+
| Name |
Level |
HP |
MP |
EXP |
AP |
GIL |
| Gi
Nattak |
29 |
5500 |
200 |
1400 |
150 |
3000 |
| Location |
Attacks |
| Cosmo
Canyon, Cave of the Gi. |
Hit
- Take Over - Aspil |
| Immune |
Weakness |
| Earth
- Wind - Poison - Gravity - Leviathan - Confusion - Silence
- Berserk - Petrify - Paralyze - Manipulate - Mystify - Transform
- Stop - Death |
Ice
- Restore - Revive - Alexander |
| Steal |
Morph |
Win |
Enemy
Skill |
| None |
None |
Wizer
Staff (A Weapon for Aeris) |
None |
| Strategy |
|
This battle can be either hard or easy. You
can battle it out with your Summons and 'Ice' Magic, or
you can use 'Cure' and Phoenix Downs.
Another annoying part of this battle is that your party
will be worn out from those really hard Spiders before.
You might not even have any Phownix Downs or MP for this
Boss!
Anway, Gi Nattak will be accompanied by Soul Fires, which
he can order to 'Take Over' one of your characters, causing
continuous Fire damage. This can be converted to HP however
if that character has a 'Fire' + 'Elemental' equipped on
his/her Armor, or a Fire Ring Accessory. Otherwise, ignore
the Soul Fires.
Using 'Shiva', 'Ice', 'Cure' or a Phoenix Down, is the best
way to get his HP down. As Gi Nattak is an 'Undead' Fire
type monster, Ice, curative magic and Items work very well.
But to instantly kill him, you can use a Phoenix Down to
do so, it doesn't work 100% of the time though...
Limits are good attacks, but, funnily enough, not as good
as Cure. ^_^
When Gi Nattak is finally defeated, you'll get Aeris' Wizer
Staff, phew!
|
Soul Fire
 Difficulty
 - Not Easy
Recommended Level - 22+
| Name |
Level |
HP |
MP |
EXP |
AP |
GIL |
| Soul
Fire |
21 |
1300 |
220 |
200 |
10 |
100 |
| Location |
Attacks |
| Cosmo
Canyon, Cave of the Gi. |
Fire2 |
| Immune |
Weakness |
| Earth
- Water - Wind - Poison - Gravity - Leviathan - Confusion
- Silence - Berserk - Petrify - Paralyze - Manipulate - Mystify
- Transform - Stop - Death |
Ice
- Wind - Alexander |
| Steal |
Morph |
Win |
Enemy
Skill |
| None |
None |
Wizer
Staff (A Weapon for Aeris) |
None |
| Strategy |
|
Gi Nattak will be accompanied by Soul Fires,
which he can order to 'Take Over' one of your characters,
causing continuous Fire damage. This can be converted to
HP however if that character has a 'Fire' + 'Elemental'
equipped on his/her Armor, or a Fire Ring Accessory. Otherwise,
ignore the Soul Fires, they regenerate anyway.
|
Materia Keeper
 Difficulty
 - Medium
Recommended Level - 25+
| Name |
Level |
HP |
MP |
EXP |
AP |
GIL |
| Materia
Keeper |
38 |
8400 |
300 |
3000 |
200 |
2400 |
| Location |
Attacks |
| Mt.
Nibel. |
Big
Horn - Hell Combo - Trine - Cure2 |
| Immune |
Weakness |
| Fire
- Gravity - Confusion - Sleep - Silence - Berserk - Petrify
- Manipulate - Mystify - Transform - Seal - Stop - Death |
None |
| Steal |
Morph |
Win |
Enemy
Skill |
| None |
None |
Jem
Ring (Accessory) |
Trine |
| Strategy |
|
The Materia Keeper is one of the hardest Bosses
of the first Disc! Being able to Cure itself and cause massive
damage is not good.
To start off, use 'Cross Slash' or 'Chocomog' to temporarily
stun MK, giving you a head start. ^_^
If you defeated the Optional Boss, Lost Number, at Nibelheim,
then you should have the 'Odin' Summon. It is very effective
so use it as soon as possible.
Limits and the Enemy Skill, 'Aqualung', work briiliantly.
Bio can also be used against MK.
Towards the end of the battle, MK will use 'Trine', although
it causes major damage, make sure you have an Enemy Skill
equipped to learn it.
Remember to not use 'Fire' and 'Ifrit' as MK aborbs
Fire damage. And don't forget to watch your HP! MK causes
lots of damage so 'Cure2' with an 'All' is recommended!
After that tricky battle you'll get a Jem Ring Accessory.
Congrats!
|
Palmer
 Difficulty
 - Not quite so Easy
Recommended Level - 26+
| Name |
Level |
HP |
MP |
EXP |
AP |
GIL |
| Palmer |
38 |
600 |
240 |
1800 |
98 |
5000 |
| Location |
Attacks |
| Rocket
Town. |
Mako
Gun |
| Immune |
Weakness |
| Gravity
- Confusion - Sleep - Silence - Berserk - Petrify - Manipulate
- Mystify - Transform - Seal - Stop - Death |
None |
| Steal |
Morph |
Win |
Enemy
Skill |
| None |
None |
Edincoat
(Armor) |
None |
| Strategy |
|
Compared to the Materia Keeper, Palmer is
a pushover. He uses one attack called 'Mako Gun' that causes
Fire, Ice and Lightning damage, but it is not to be worried
about.
Use Summons, Limits and physical attacks, also 'Bio' is
pretty effective.
Soon his measly 600 HP will have vanished and he'll taunt
you while running away...
... Splat. ^_^
|
Red Dragon
 Difficulty
 - Medium
Recommended Level - 28+
| Name |
Level |
HP |
MP |
EXP |
AP |
GIL |
| Red
Dragon |
39 |
6800 |
300 |
3500 |
200 |
1000 |
| Location |
Attacks |
| Temple
of the Ancients. |
Bite
- Tail - Red Dragon Breath |
| Immune |
Weakness |
| Fire
- Gravity - Bad Breath - Confusion - Sleep - Silence - Berserk
- Petrify - Manipulate - Mystify - Transform - Stop - Death |
None |
| Steal |
Morph |
Win |
Enemy
Skill |
| None |
None |
Dragon
Armlet (Armor) |
None |
| Strategy |
|
Right, as you probably know, 'Fire', 'Ifrit'
or 'Kjata' won't work as RD is a Fire based monster. So
what do you use? No, not butterflies... *Rolls eyes* 'Ice'
or 'Shiva' work very well because they are the opposite...
Element. Well done! See, you're getting the hang of it now!
^_^
Ahem, use Summons, Limits, Enemy Skills, 'Ice' Magic and
don't forget to Cure!
Good luck! Oh and equip the Dragon Armlet Armor, it's pretty
good!
|
Demon Gate
 Difficulty
 - Over Medium
Recommended Level - 30+
| Name |
Level |
HP |
MP |
EXP |
AP |
GIL |
| Demon
Gate |
45 |
10000 |
400 |
3800 |
220 |
4000 |
| Location |
Attacks |
| Temple
of the Ancients. |
Rock
Drop - Cave In - Demon Rush |
| Immune |
Weakness |
| Earth
- Poison - Gravity - Bad Breath - Confusion - Sleep - Silence
- Berserk - Petrify - Paralyze - Manipulate - Mystify - Transform
- Stop - Death |
None |
| Steal |
Morph |
Win |
Enemy
Skill |
| None |
None |
Gigas
Armlet (Armor) |
None |
| Strategy |
|
Demon Gate, pretty much the hardest Boss of
Disc one... Not only does he have the highest amount of
HP-MP, (10,000 HP!) he has the most devastating attacks.
'Rock Drop' where a large stone falls on top of a character,
doing around 600-800 damage; 'Cave In' and 'Demon Rush'
which both deal about 900-1200!!
Ok, strategy time! Equip your best armor, use the Enemy
Skill 'Big Guard', and always have a healing character on
standby to cure your party, preferably in the back row.
'Cure' + 'All' for your main curing method, but you can
also use Aeris' Limits. If you have 'Great Gospel', (which
you should have by now) use it as often as possible!
Now for damage, don't use Elements, they are not the way
to win this battle, you might as well flush 'Shiva', 'Ifrit',
'Ramuh' and 'Kjata' down the toilet for all Demon Gate cares...
^_^
Limits, physical attacks, (these work surprisingly well)
and the newly aquired 'Bahamut' is a must!
Enemy Skills can also be used, 'Trine' and 'Aqualung' work
well.
After your hardest battle yet, you'll get a Gigas Armlet
Armor, well done!
|
JENOVA LIFE
 Difficulty
 - Over Medium
Recommended Level - 34+
| Name |
Level |
HP |
MP |
EXP |
AP |
GIL |
| JENOVA
LIFE |
50 |
10000 |
300 |
4000 |
350 |
1500 |
| Location |
Attacks |
| The
Forgotten City. |
Blue
Light - Blue Flame - Aqualung - Reflect |
| Immune |
Weakness |
| Water
- Poison - Gravity - Leviathan - Bad Breath - Confusion -
Sleep - Silence - Berserk - Petrify - Manipulate - Mystify
- Transform - Stop - Death |
Earth |
| Steal |
Morph |
Win |
Enemy
Skill |
| None |
None |
Wizard
Bracelet (Armor) |
Aqualung |
| Strategy |
|
Yes, Jenova is back and tougher than ever!
Although she is relatively easy, (seeing as your gaming
spirit is crushed by the previous scene) and you'll need
to watch out for certain attacks.
Blue Light and Flame are moderate attacks dealing around
500 damage, but Jenova will using them 2-3 times a turn
so keep those HP levels up! Casting magic is useless against
her as she uses 'Reflect' to bounce the magic onto your
party. So whatever you do, do not cast 'Reflect on yourself!
It won't solve anything, it'll just make any magic bounce
between the two sides eternally!
Instead use physical attacks, Limits and Summons. 'Titan',
'Bahamut' and 'Kjata' are good for eliminating some HP.
She will also use 'Aqualung' which is pretty devastating
for your party, counter this by having 'Leviathan' + 'Elemental'
linked on your Armor, or equipping that Water Ring Accessory
you got earlier.
So give it all you've got, (despite the previous scene)
and avenge your friend! You'll be awarded a Wizard Bracelet
Armor for your hard work. Congratulations.
|
|
|
Disc Two
|
Disc Three
|
Optional Bosses
|
By FFFreak.
|


